The following takes you through the PC browser version of Junify. To add an Application Card using the mobile app [click here].
Log into Junify on your PC browser > Click on the Applications icon ![]() in the left navigation menu > Then MANAGE LIST tab in the Applications window.
in the left navigation menu > Then MANAGE LIST tab in the Applications window.

|
Don't see this option? Only administrators (user role: Owner/Manager) will have access to the MANAGE LIST tab. |
From the Applications page, you can:
- Add/Delete/Edit Application Cards
- Add/Remove member access to application cards
To Add an Application Card:
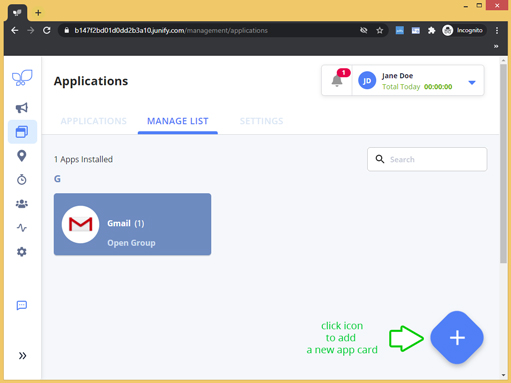
1. Click the Add New App button
|
Screen view on a new account
|
Screen view on an established account
|

2. Select your application.
Use the Categories section and/or search filter to narrow your view. Junify continues to add applications on a regular basis. Click on your application's icon as it appears to the right of the categories list. Don't see the application your need? Please contact support@junify.com to inquire or contact your Junify account manager.

3. Select the Authentication method if prompted.
Select applications such as Gmail allow SAML SSO. Junify will prompt you should additional options be available. Select the protocol that supports your security policies. Since configurations vary for each SAML integration, the following will continue with Web Form Authentication

4. Input Application card details.
Input Card Display Name and Bookmark (optional).
- The Card Display Name will default, but can be customized for your users.
- By default this field is blank. A custom landing page will redirect your user to a dedicated page.
|
Tip: The custom URL feature is useful when you want to share a particular page that can be seen after log-on to a service. For example, you can share a PDF document link in Dropbox with your members as a Dropbox card with the custom URL. When a member clicks the Dropbox card, the member will be redirected to the document page after Junify performs the auto-login. |

Select your Authorized Groups and Users.
- Apply to whole organization - allows all users to access the application card
- Select groups or an individual user - allows you to manage select access
- Click the [+] icon to add members or groups. If no groups are set up, all members will belong to an "Unassigned" group. Click the down arrow to expand the row.

-
- By clicking your member's name, they now will appear in the right column. Scroll down and click save to save your selection.

-
- Once successfully saved, you will be redirected back to your Application Card setup window displaying your member selection(s)

Select your Credential Type.
- Use shared account - select this option if this is a master account that users will be accessing
-
Enter your account information. Members will not be able to see this information. Managers/Owners will be able to see the username, but password will be masked. Click [Save] button when completed.

-
- Use member account - select this option if each member has a separate login
-
- Company Managed - if company is setting usernames and passwordsYou'll have two options to select from
- Member Managed - if member is setting username and password
-

- Enter your account information, if prompted. Scroll down and click [Save] to complete.

After completed input, your screen should look similar to below.

5. Click Publish.
Clicking the [Publish] button will generate the card for members you have authorized to access.
 |
Member's View |